Last updated October 15, 2026
ADU Warning Signs: A Santa Clarita Homeowner’s Reference Guide
A 1/8-inch gap at the corner where an ADU’s roof meets an existing garage wall isn’t cosmetic. In Santa Clarita’s thermal climate, where summer days hit 95°F and winter nights drop below freezing, that gap usually means the tie-in connection is moving. Left for one more summer cycle, it becomes a water intrusion path that can rot a rafter tail before you see a single interior stain. Most ADU problem guides only describe what failure looks like after it’s already expensive. For The Complete Guide to ADU in Santa Clarita and other resources, see our blog. We’re going to teach you what to watch for six to eighteen months before that, when a small fix still costs hundreds, not thousands. Along the way, we’ll separate normal building behavior from actual warning signs so you’re not calling a contractor every time the wood creaks. And we’ll give you a documentation protocol that makes warranty claims cleaner and contractor accountability easier, whether you built with us or someone else.
Quick Answer
The most common ADU warning signs in Santa Clarita are exterior cracks wider than 1/8 inch at wall corners or foundation joints, interior doors that bind against their frames in summer, humidity readings persistently above 60% inside, and mini-split systems that lose cooling capacity without a corresponding thermostat change. Each of these signals a specific underlying issue: settlement, drainage, vapor barrier failure, or refrigerant loss. Hairline cracks under 1/16 inch, minor wood creaking, and slight color changes in caulk are normal for any new structure and don’t require contractor intervention.
Table of Contents
- Exterior Warning Signs: What to Watch for Outside
- Interior Warning Signs: Moisture, Movement, and More
- HVAC and Mechanical Warning Signs Specific to ADUs
- Normal Settlement vs. Problem Settlement: How to Tell the Difference
- What to Document Before Calling a Contractor
- Common Mistakes to Avoid
- When to Call a Professional
- Frequently Asked Questions
Exterior Warning Signs: What to Watch for Outside
The exterior of your ADU is where the earliest and clearest warning signs appear. In Santa Clarita, you’re dealing with a specific set of forces: intense UV exposure that degrades caulk and paint faster than coastal climates, thermal expansion cycles that test every joint, and clay-heavy soil in many neighborhoods that expands and contracts with moisture. The key is knowing which exterior changes are cosmetic and which are structural.
Start with the foundation line. Walk the entire perimeter of your ADU once a season. You’re looking for cracks in the exposed stem wall or slab edge. A vertical hairline crack under 1/16 inch is normal and usually shows up within the first 12 to 24 months as the concrete cures and the structure settles. A crack wider than 1/8 inch, especially one that’s wider at the top than the bottom, is a watch-it signal. A crack that’s offset, meaning one side of the crack sits proud of the other by even 1/16 inch, is a call-someone signal. That offset means the two sides are moving independently, which points to differential settlement rather than normal shrinkage.
Next, inspect the wall cladding. Whether your ADU is clad in James Hardie fiber cement, stucco, or a prefab panel system from a builder like ADU Builders in Santa Clarita commonly installs, you’re watching for three things: buckling, staining, and gaps at the corner boards. Buckled or wavy cladding indicates moisture behind the siding, usually from a failed weather-resistant barrier or a leak at a window head. Staining that appears below a window or at the bottom of a wall suggests water is getting in and traveling down. A persistent dark stain that doesn’t dry out within 48 hours of a rain is a call-someone signal. Gaps at corner joints where two cladding planes meet should never exceed 1/8 inch. If you can see daylight through a corner joint or fit a credit card into it without resistance, the building wrap behind it is exposed to the elements.
The roof-to-wall tie-in is the single most important junction to inspect on a Santa Clarita ADU, especially if your structure connects to an existing home or garage. This is where different building materials, different ages of construction, and different thermal movement rates all meet. Look at the flashing and the sealant line. Separated flashing that you can lift with your fingers is an immediate call-someone. Sealant that’s cracked, pulling away, or missing in sections means the water-shedding layer is compromised. In our experience, Santa Clarita homeowners who catch roof-to-wall sealant failure early spend around $400 to $900 on resealing and minor flashing repair. The same problem left for a full winter rain season becomes a $3,000 to $8,000 repair involving rotted framing, new sheathing, and interior drywall replacement.
Finally, check windows and exterior doors. Walk up to each window and door from the outside and look at the frame-to-wall joint. The caulk line should be continuous with no cracks longer than 1 inch. Run your finger along the bottom of each exterior door threshold; if the joinery feels loose or you can rock the door frame by pressing on the corner, the rough opening has moved. In Santa Clarita’s dry climate, minor frame shrinkage is expected in the first two summers. Persistent movement beyond year two, especially if it’s getting worse, is worth documenting and discussing with a contractor.
A Seasonal Inspection Walk: What to Look For
- Foundation line: Walk the perimeter looking for cracks wider than 1/8 inch or offset cracks at any width.
- Wall cladding: Check for buckling, water staining below windows, and separations at corner boards.
- Roof-to-wall tie-in: Inspect flashing and sealant along the junction, especially where the ADU meets existing construction.
- Windows and doors: Test thresholds for movement, examine caulk lines for cracks longer than 1 inch.
- Grade and drainage: Look for soil pulling away from the foundation or water pooling near the base after irrigation or rain.
Interior Warning Signs: Moisture, Movement, and More
Interior warning signs require different detective work than exterior ones because they’re often subtle. The homeowner who catches these early is the one who pays attention to small changes instead of dismissing them as “the house settling.”
Humidity is your most reliable interior diagnostic tool. A $15 digital hygrometer from any hardware store will tell you more about your ADU’s health than a visual inspection alone. In Santa Clarita, where outdoor humidity typically ranges from 30 to 50 percent, a properly functioning ADU should hold interior humidity between 35 and 55 percent. Persistent readings above 60 percent, especially during dry months, indicate one of three things: a vapor barrier failure in the floor slab or crawl space, inadequate ventilation in the bathroom or kitchen, or a slow water intrusion that hasn’t shown itself visually yet. If you get a high reading, run a simple cross-check: close all windows and doors, run the bathroom exhaust fan for 20 minutes, and check the reading again. If humidity stays high with active ventilation, you’re likely dealing with a vapor barrier issue, not a ventilation issue. In crawl-space ADUs, a vapor barrier that’s torn, missing, or improperly lapped lets soil moisture rise into the conditioned space, and in Santa Clarita’s clay soil, that can be a year-round problem, not just a rainy-season one.
Door and window binding deserves careful interpretation. A door that sticks only in late summer, when temperatures push the building envelope to its maximum thermal expansion, is usually normal. A door that sticks year-round and is getting progressively harder to open is a foundation movement signal. The diagnostic test is simple: measure the gap at the top of the door on all four corners. If the gap is uniform and the door still binds, the frame itself has racked. If the gap is uneven, the floor has moved. Either way, a door that can’t open without force in an ADU is a call-someone signal, not a “let’s wait and see” signal. It means the structural load path has shifted, and you want to know why.
Efflorescence on concrete slabs is a warning sign most homeowners misread. That white, chalky deposit that appears on the surface of an exposed concrete slab or stem wall is not a harmless cosmetic artifact. It’s minerals left behind when water moves through the concrete and evaporates. The presence of efflorescence means water is moving through your slab, full stop. In an ADU with a properly installed vapor barrier, you should see no efflorescence on interior floors. On exterior exposed concrete, minor efflorescence in the first year is common as the concrete cures and residual moisture escapes. Persistent efflorescence that reappears after cleaning, or efflorescence that forms in a line along the base of an interior wall, indicates sub-slab moisture and a drainage or barrier problem. In Santa Clarita, this is frequently tied to irrigation overspray against the foundation or downspouts discharging too close to the building.
Drywall cracks follow predictable rules. A straight, vertical crack at the corner of a window or door opening, under 1/16 inch wide, is normal stress relief at the point where the drywall is weakest. These show up in the first year and stabilize. A diagonal crack running from the corner of a window toward the ceiling, especially one that widens over time or reappears after patching, is a settlement signal. A horizontal crack along a wall is the one we tell Santa Clarita homeowners to take most seriously, because horizontal drywall cracks in an ADU can indicate lateral soil pressure against a foundation wall or shear stress in the wall assembly. If you see a horizontal crack, take photos from two angles, write the date on a piece of painter’s tape, stick it next to the crack, and photograph it again in 30 days.
HVAC and Mechanical Warning Signs Specific to ADUs
ADUs have mechanical systems that differ from primary residences in important ways. The systems are smaller, the margins are thinner, and because the spaces are more tightly built than older homes, problems show up differently. Santa Clarita’s hard water adds another variable that generic ADU guides don’t address.
Mini-split heat pumps are the dominant HVAC solution in Southern California ADUs, and they fail in predictable ways. The most common early warning sign is gradual capacity loss: the unit runs longer to hit the same thermostat setting, or it never quite reaches the temperature it reached last summer. This is usually refrigerant loss, and it’s slow. A mini-split that loses 10 to 15 percent of its charge won’t trigger an error code; it’ll just run longer and deliver less cooling. The diagnostic move is to compare run-times. If the same thermostat setting that held 75°F inside on a 95°F day last August now only holds 79°F on the same kind of day, you’re losing refrigerant. The fix is typically a leak search and recharge, which in Santa Clarita runs $300 to $800 depending on the size of the system and whether the leak is accessible. Ignoring it doesn’t just cost you efficiency; it shortens the compressor’s life, and compressor replacement on a mini-split usually exceeds $1,200 for the part alone.
Another mini-split warning sign is ice formation on the indoor coil or the exterior line set. A thin frost layer on the outdoor unit in winter is normal during defrost cycles. Ice on the indoor unit, or ice on the copper lines outside during summer, is not. This signals low refrigerant, restricted airflow from a clogged filter, or a failing expansion valve. If you see ice, turn the unit to fan-only mode to thaw it and call for service. Running a frozen unit compresses liquid refrigerant, and that’s the fastest way to destroy a compressor.
Tankless water heaters are common in ADUs because they’re compact and efficient. In Santa Clarita, where water hardness typically runs 10 to 15 grains per gallon, scale buildup is the leading cause of premature tankless failure. The warning signs are specific. You’ll notice a gradual drop in maximum hot water temperature even though the unit is set the same. You’ll see flow rate drops, meaning the shower pressure feels fine on cold but noticeably weaker on hot. And eventually, you’ll see error codes: on most units, a “LC” or “SC” code indicates scale buildup is triggering the flow sensor or the heat exchanger is overheating. The fix is a descaling flush with a mild acid solution, which takes a plumber about an hour and runs $150 to $300 in Santa Clarita. Left untreated, scale buildup leads to heat exchanger replacement, which on many tankless units costs $500 to $900 in parts and often triggers the question of whether the unit is worth repairing at all.
Electrical panels in ADU configurations deserve special attention because most Santa Clarita ADUs are fed from a sub-panel run off the main home’s service, not from a dedicated utility drop. The warning signs are thermal and auditory. A warm breaker, one that’s noticeably warmer than the breakers around it after the ADU’s air conditioner has been running for an hour, indicates a loose connection or an overloaded circuit. A buzzing or sizzling sound from the panel is always a call-someone-right-now signal because it means arcing. Flickering lights when the mini-split compressor kicks on is common and usually harmless in a small panel, but if the flicker gets worse over time or extends to outlets, you’re looking at a neutral issue or an undersized feed. In our experience, the most common electrical problem in Santa Clarita ADUs isn’t a panel failure; it’s a sub-panel that was sized for the original load and then had an EV charger, a pool pump, or a home office added to it without a load calculation. If your sub-panel’s main breaker matches its bus rating, meaning the breaker is the same size as the panel’s maximum capacity, and you’re adding load, you need a load calculation before adding anything else.
Normal Settlement vs. Problem Settlement: How to Tell the Difference
Every new structure settles. Concrete cures. Wood dries. Soil compacts under new load. This is normal, predictable, and not a defect. The challenge is that normal settlement and problem settlement produce some of the same visual signals, and misreading them either causes needless worry or dangerous complacency. Here’s how to tell the difference with confidence.
Normal settlement in a Santa Clarita ADU typically follows this pattern: it starts within the first 60 days, reaches peak activity between months 6 and 18, and is essentially complete by month 24. The cracks it produces are hairline, under 1/16 inch wide, and they appear at the structural weak points: corners of window and door openings, the junction between different materials like drywall and wood trim, and along taped drywall seams. These cracks are stable. They don’t grow after the initial appearance. They’re the same width at the top as at the bottom. And they don’t correlate with any functional problem; no door binds, no water intrudes, nothing leaks.
Problem settlement looks different in five specific ways. First, the cracks are wider, starting at 1/8 inch and sometimes reaching 1/4 inch or more. Second, they’re unstable: the crack you patched in March reopens by June, and it’s wider than it was. Third, they’re directional. A crack that’s wider at one end than the other indicates differential movement, meaning one part of the foundation is sinking faster than another. Fourth, they correlate with function. Doors that previously opened fine now bind. A floor that was level now has a visible slope. A window that closed easily now requires force. Fifth, they appear in specific patterns. Stair-step cracks in masonry or stucco that follow mortar joints in a diagonal path are classic differential settlement. A vertical crack that runs the full height of a wall, from floor to ceiling, especially if it appears in the same location on both the interior and exterior, indicates the structure is separating along a joint.
In Santa Clarita, the soil context matters. Many neighborhoods in the Santa Clarita Valley sit on expansive clay that swells when wet and shrinks when dry. A wet winter followed by a dry summer cycles the soil through enough volume change to move a lightly loaded structure. ADUs are more vulnerable to this than primary homes because they often sit on smaller, shallower foundations with less mass to resist soil movement. If your ADU sits on a slab-on-grade foundation in a neighborhood with clay soil, and you’re seeing settlement activity that peaks in late summer and stabilizes in winter, you’re likely seeing soil moisture cycling, not foundation failure. The fix is often drainage: extending downspouts, correcting grade to slope away from the foundation, and maintaining consistent irrigation around the perimeter rather than letting the soil go through extreme wet-dry cycles.
The Crack Classification System We Use
- Hairline crack, under 1/16 inch, stable: Normal. Document with a photo and a date. Check again in 90 days.
- Hairline crack that grows or reopens after patching: Watch. Document monthly. If growth continues for 6 months, call for an assessment.
- Crack over 1/8 inch with no offset: Call for an assessment. This exceeds normal settlement tolerance for a structure less than 5 years old.
- Any crack with visible offset, any width: Call now. Offset means independent movement on either side of the crack, which is a structural signal, not a cosmetic one.
- Horizontal crack in a wall or foundation: Call now. Horizontal cracks suggest lateral pressure, not vertical settlement, and require professional evaluation.
What to Document Before Calling a Contractor
The quality of your documentation determines the quality of your repair, the speed of your diagnosis, and the cleanliness of your warranty claim. Homeowners who arrive with organized evidence get better service, clearer explanations, and more accurate pricing. Homeowners who call and say “there’s a crack somewhere” get scheduled last and quoted worst-case.
Here is the documentation protocol we recommend and the one our team uses when a homeowner shows us an issue.
Start with the photo protocol. Use your phone, but be systematic about it. The first photo should be a wide shot from 10 to 15 feet away that shows the entire wall or area so the contractor can see the context. The second photo should be a mid-shot from about 3 feet that shows the specific problem area in relation to nearby reference points like windows, doors, or corners. The third photo should be a close-up with a scale reference: a quarter, a ruler, or a pencil held against the crack. Get an angle shot too, meaning the camera held at a low angle to show whether one side of a crack is offset from the other. Every photo should have the date in the filename or be stored in a labeled folder. An iPhone automates this for you; a piece of painter’s tape with the date written on it, stuck next to the problem, is the low-tech backup that works in every photo.
Add the measurement protocol next. For cracks, measure the width at the widest point, at the middle, and at both ends. Record these numbers. For moisture, use a $15 hygrometer and record the reading, the outdoor temperature, the outdoor humidity from your weather app, and whether any windows or doors were open in the past 24 hours. For drainage issues, record the date, the amount of rainfall or irrigation, and note where water pooled and how long it took to drain. For mechanical issues like HVAC or water heater problems, write down the exact model number, the exact error code if one appeared, and the symptom in one sentence: “Unit ran continuously from 2 PM to 6 PM and held 79°F against a 76°F setpoint on a 93°F day.”
Then create a simple log. A Google Sheet or a notes app entry with four columns: Date, Observation, Measurement, Action Taken. Enter a row every time you check, even if the answer is “no change.” That’s valuable information too because it tells the contractor the problem is stable versus progressing. Bring this log to the contractor visit. A homeowner who can hand over three months of documented observations is a homeowner who gets taken seriously.
Finally, locate your warranty documents before you call. If your ADU was built by a licensed contractor in Santa Clarita, you likely have a workmanship warranty covering materials and labor for a specific period, plus manufacturer warranties on appliances, windows, roofing, and HVAC equipment. Know what’s covered and what’s excluded before you call. Some issues, like a failing water heater after year three, are covered by the manufacturer’s warranty even if the builder’s workmanship warranty has expired. A homeowner who calls and says “I believe this is a warranty item, here’s my documentation” starts the conversation from a position of leverage. A homeowner who doesn’t know what their warranty covers is paying retail for whatever the contractor decides to charge. At Sutton ADU Santa Clarita, our Sutton ADU Santa Clarita home page lays out the 365-Day Done Right Promise in plain terms: if the work isn’t right within a full year, we make it right. That’s a written guarantee, not a verbal assurance, and it applies to every project we complete.
Common Mistakes to Avoid
- Assuming all cracks are normal. Hairline cracks are normal. Cracks over 1/8 inch, offset cracks, and horizontal cracks are not. The homeowner who dismisses every crack as “just settling” is the homeowner who discovers a $12,000 foundation problem in year five that a $1,500 fix would have addressed in year two.
- Sealing over cracks without diagnosing why they’re there. Caulk and sealant are water barriers, not structural fixes. If you seal a crack without understanding whether it’s active settlement, you’ve hidden the symptom, not solved the problem. The crack will reappear, and next time it’ll be behind your new paint job.
- Ignoring humidity readings because “it doesn’t feel damp.” Mold growth starts at 60% relative humidity and can thrive in materials that don’t feel wet to the touch. In Santa Clarita, a home that doesn’t feel humid to a human can still be humid enough for microbial growth in wall cavities and under flooring.
- Running a frozen mini-split to “thaw it out” on cooling mode. This is the single most common self-inflicted HVAC injury we see. Running a frozen unit in cooling mode forces liquid refrigerant through the compressor, which can destroy it. If you see ice, switch to fan-only mode and call for service.
- Assuming a prefab ADU doesn’t need settlement monitoring. Prefab ADUs from manufacturers like Dvele, Boxabl, and Plant Prefab go through rigorous factory quality control, but they still sit on foundations, and those foundations still interact with Santa Clarita soil. The structure is only as stable as the ground it sits on, and that ground moves.
- Adding electrical load without a load calculation. Electric vehicle chargers, additional mini-split heads, pool pumps, home office equipment, and even a second refrigerator all add load. If your sub-panel was sized for the original ADU design, adding these without checking capacity is a thermal event waiting to happen.
- Documenting orally instead of in writing. “I told the contractor about it last year” carries no weight in a warranty dispute. A dated photo, a measurement, and a log entry do. The homeowner who documents in writing gets warranty work approved faster, period.
When to Call a Professional
Some warning signs are DIY-observable but not DIY-fixable. You should call a professional when you see any of these: a crack wider than 1/8 inch that’s growing, any crack with vertical or horizontal offset, a door that’s binding and getting worse, humidity above 60% that doesn’t respond to ventilation, ice on a mini-split in summer, a warm or buzzing electrical panel, persistent efflorescence reappearing after cleaning, or a roof-to-wall sealant gap you can see daylight through. These are not “wait and watch” items. They’re “get an assessment now” items. Most Santa Clarita ADU issues caught at the assessment stage are repairable for a fraction of what the same problem costs after failure. Delaying a $400 resealing job turns it into a $6,000 rotted-framing project. Delaying a $200 descaling flush turns it into a $900 heat exchanger replacement. The math favors early action every single time. If you’re in Santa Clarita and you’ve spotted something on this list, Sutton ADU Santa Clarita offers free estimates. Call (661) 430-0429 and we’ll send someone to look, document what they find, and give you a written assessment with real numbers.
Frequently Asked Questions
Foundation repair on a Santa Clarita ADU typically ranges from $1,500 for minor crack injection and sealing to $15,000 or more for underpinning or full foundation replacement, depending on the size of the structure and the severity of the movement. Most Santa Clarita ADUs that need foundation work fall in the $3,000 to $8,000 range for isolated pier repairs, soil stabilization, or drainage correction that addresses the root cause. The largest cost variable is whether the foundation problem is caused by drainage, which is usually fixable with grading and downspout work, or by soil movement, which may require deeper intervention. Call (661) 430-0429 for an exact quote on your situation; estimates are free.
It shouldn’t if you’re working with a contractor who provides a written price before work begins. The price should cover the scope of work as diagnosed, any known variables, and the contractor’s contingency for typical unknowns. What changes a repair price mid-project is encountering conditions that couldn’t be seen before opening a wall or excavating, like hidden rot, unexpected soil conditions, or code violations from previous work. A reputable contractor explains what they found, shows you the evidence, and gives you a written change order before proceeding. At Sutton ADU Santa Clarita, every project starts with a written price before any work begins, and change orders only happen with your sign-off. Call (661) 430-0429 to talk through your specific repair.
In Santa Clarita, foundation repairs that involve structural modification, underpinning, or changes to the load path require a permit from the City of Santa Clarita Building and Safety division, while cosmetic crack sealing and minor non-structural repairs typically don’t. The trigger is whether the repair changes how the structure carries load or involves excavation that could affect utilities. A licensed contractor who does foundation work in Santa Clarita regularly can tell you after one site visit whether your specific repair requires a permit. If the answer is yes, the permit protects you because it creates a city inspection record of the work.
Most ADU repairs in Santa Clarita take between one and five days once work begins, with the timeline driven by the type of repair and whether materials require lead time. Crack sealing and cosmetic repairs take a day. Drainage correction takes two to three days. Mini-split repair takes half a day. Heat exchanger replacement on a tankless water heater takes a day. Foundation work like pier installation or soil stabilization typically takes three to five days including inspection time. Bigger repairs that follow water damage, like replacing rotted framing and re-sheathing, can extend to two weeks if drywall and finishes are involved. The permitting process can add two to six weeks before work begins depending on city review times.
A hairline crack under 1/16 inch in a new ADU wall is normal and occurs as the concrete cures, the lumber dries, and the structure settles into its foundation. These cracks typically appear within the first 12 to 24 months and then stabilize. The right response is to photograph the crack with a scale reference, note the date, and recheck it in 90 days. If it hasn’t grown, you’re looking at normal settlement, not a problem. If it has grown, or if new cracks appear elsewhere, follow the documentation protocol in this guide and schedule an assessment. Call (661) 430-0429 if you’re unsure and we’ll help you determine whether what you’re seeing is normal.
The 365-Day Done Right Promise covers defects in workmanship for one full calendar year from project completion on every ADU, addition, and room addition project Sutton ADU Santa Clarita completes. If something we built or installed fails during that year due to a workmanship defect, we repair it at no cost to you, and that includes a second visit to diagnose and address the issue. Manufacturer defects are covered separately by the manufacturer’s warranties on materials, appliances, and equipment. The promise is written, not verbal, and it’s stamped on every project we deliver. For a full explanation of what’s covered and what’s excluded, call (661) 430-0429 and we’ll walk you through the terms in plain English.
The Bottom Line
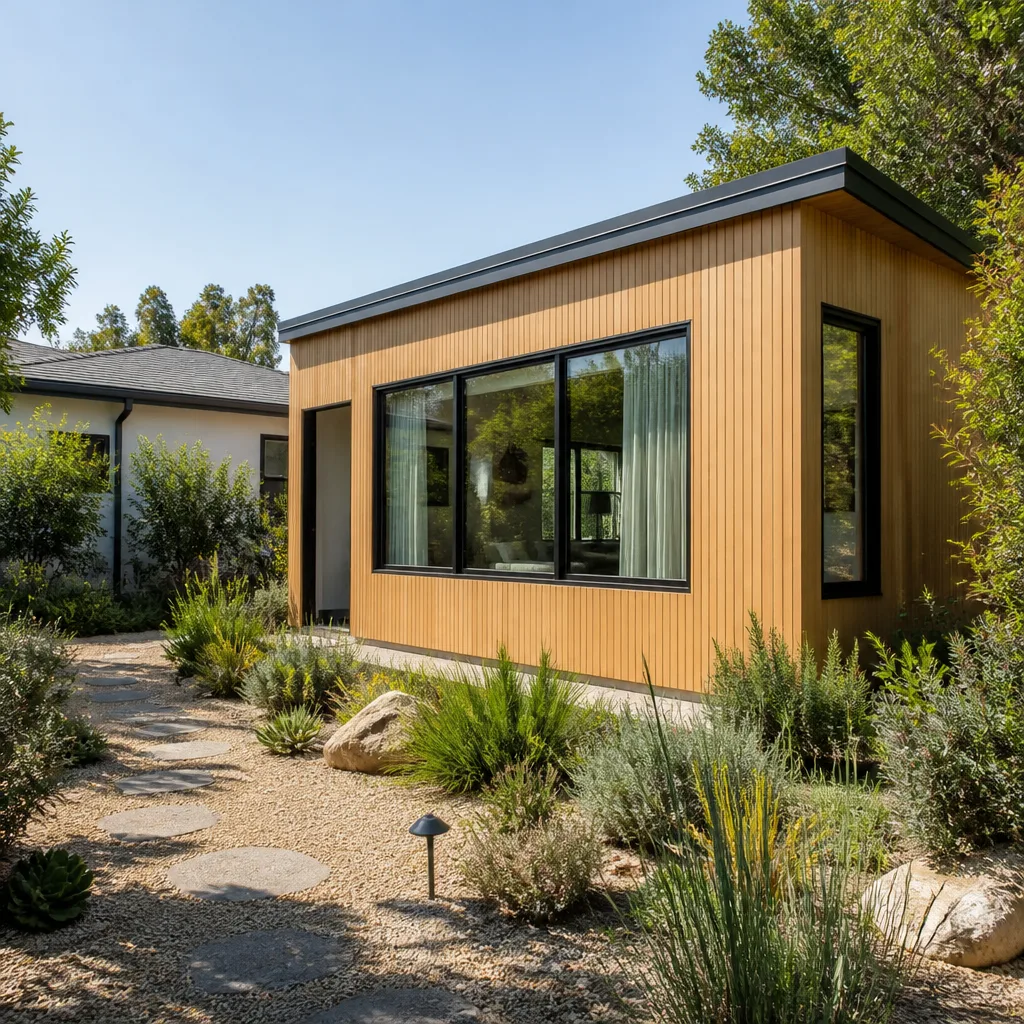
ADU problems don’t appear overnight. They build quietly: a 1/8-inch gap widening through a Santa Clarita summer, a humidity reading that creeps up one point a month, a mini-split running a little longer each August. The homeowners who catch these early signals spend hundreds on fixes. The ones who wait spend thousands on repairs. This guide gives you the tools to read the signals correctly, and you can find more guides & resources on our blog: the crack classification system that separates normal from problematic, the humidity thresholds that flag vapor barrier issues, the mechanical symptoms specific to ADUs in hard-water climates, and the documentation protocol that makes every contractor visit more productive. If you see something that concerns you, don’t guess and don’t wait. Call (661) 430-0429 for a free estimate. We’ll send a background-checked, photo-badged technician to your Santa Clarita home with a name and a face you’ll know before they arrive, a written price before any work begins, and the 365-Day Done Right Promise behind everything we do.
Written by Miles Hartwell, Owner at Sutton ADU Santa Clarita, serving Santa Clarita since 2006.